A/B Testing and Feature Management
React Native SDK lets you decouple product experiences from your app's code in real time using product variables. These variables enable you to modify the app's behavior and appearance without requiring users to download an update.
With this feature, you can create in-app product variables and set their default values to control the app's behavior and appearance. You can then use the Hansel dashboard to update these values for all users or specific segments of your user base.
This guide provides steps for using product variables. Each variable for a feature is a configuration with a key name, default value, and data type.
Types of Product Variables
Refer to the table below to understand the different types of product variables and their types.
| Type of product variable | What is it? | When to choose this? |
|---|---|---|
| String | This product variable is a collection of characters and numbers that helps you perform text-based changes in run-time. | Whenever you are customizing the content of your app or website, you can choose _string _product variable type. |
| Number | Number product variables are used to define decimal or integer values. | If you are about to make numeric changes in your app or website, select a Number product variable type. |
| Boolean | This product variable represents one of the two values - True or False. | When you want to turn OFF/ ON the features and functions of your app or website, do it in one stroke with a Boolean product variable type. |
| JSON | This product variable is a collection of Key-Value pairs to define an object for structuring data. | You can use JSON product variable type for managing entire data sets from Hansel dashboard in order to store and organize site or app content for e.g while creating a homepage. |
Step 1. Create Product Variables on the dashboard
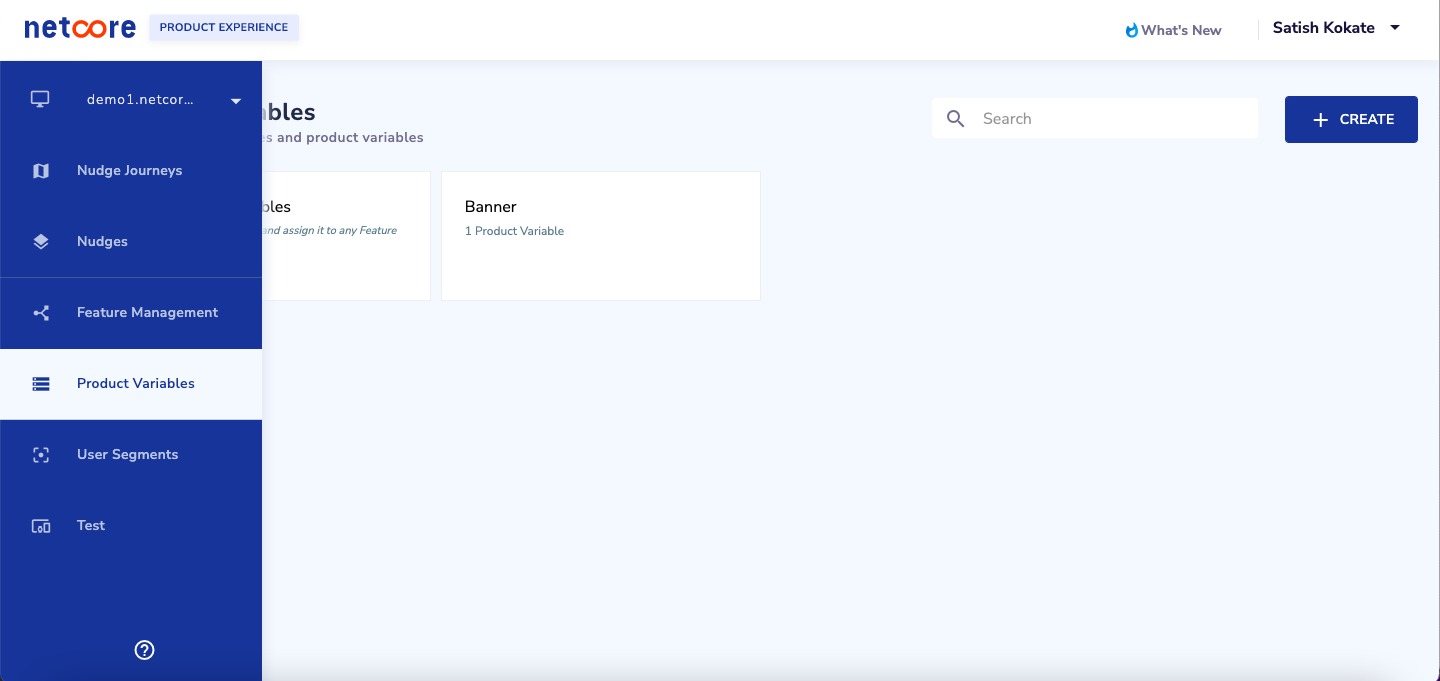
1: Head to the Product Variables section from the left menu.

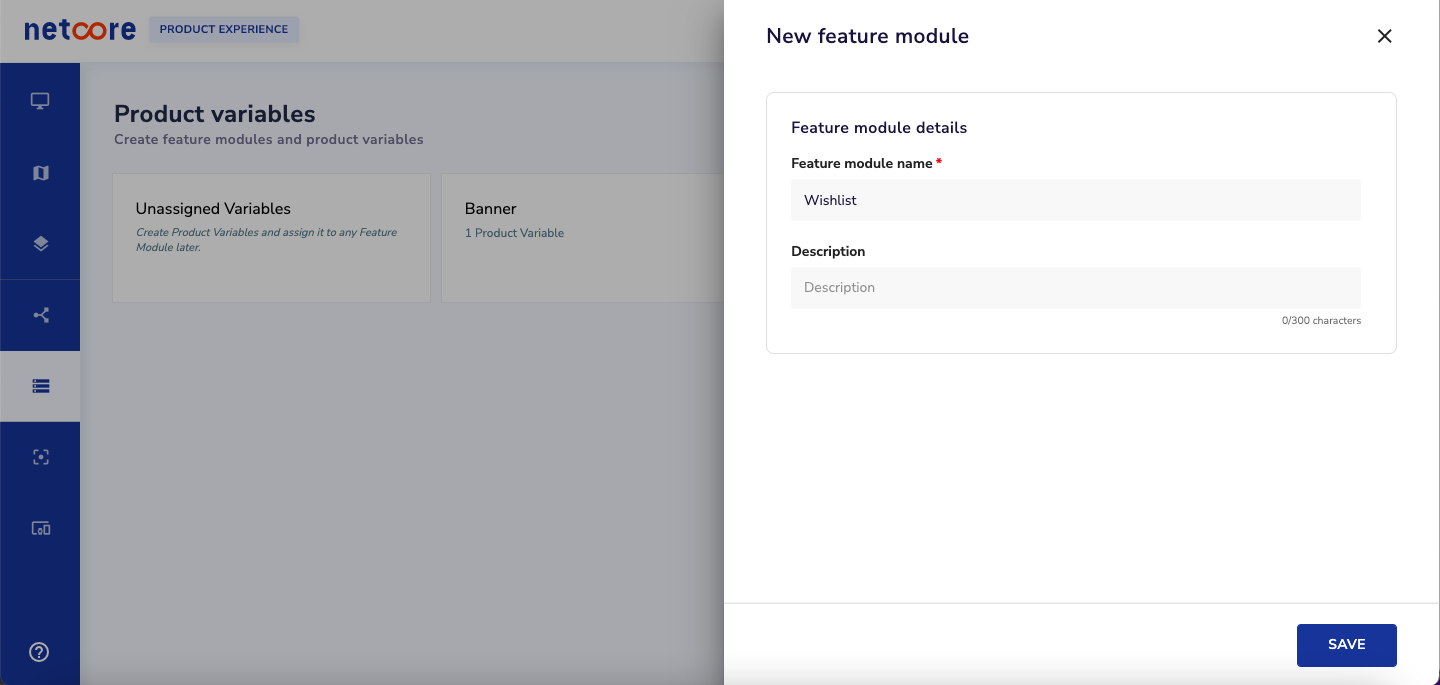
2: Click on the Create Feature Module button. A feature module is a feature where you want to define certain product variables.

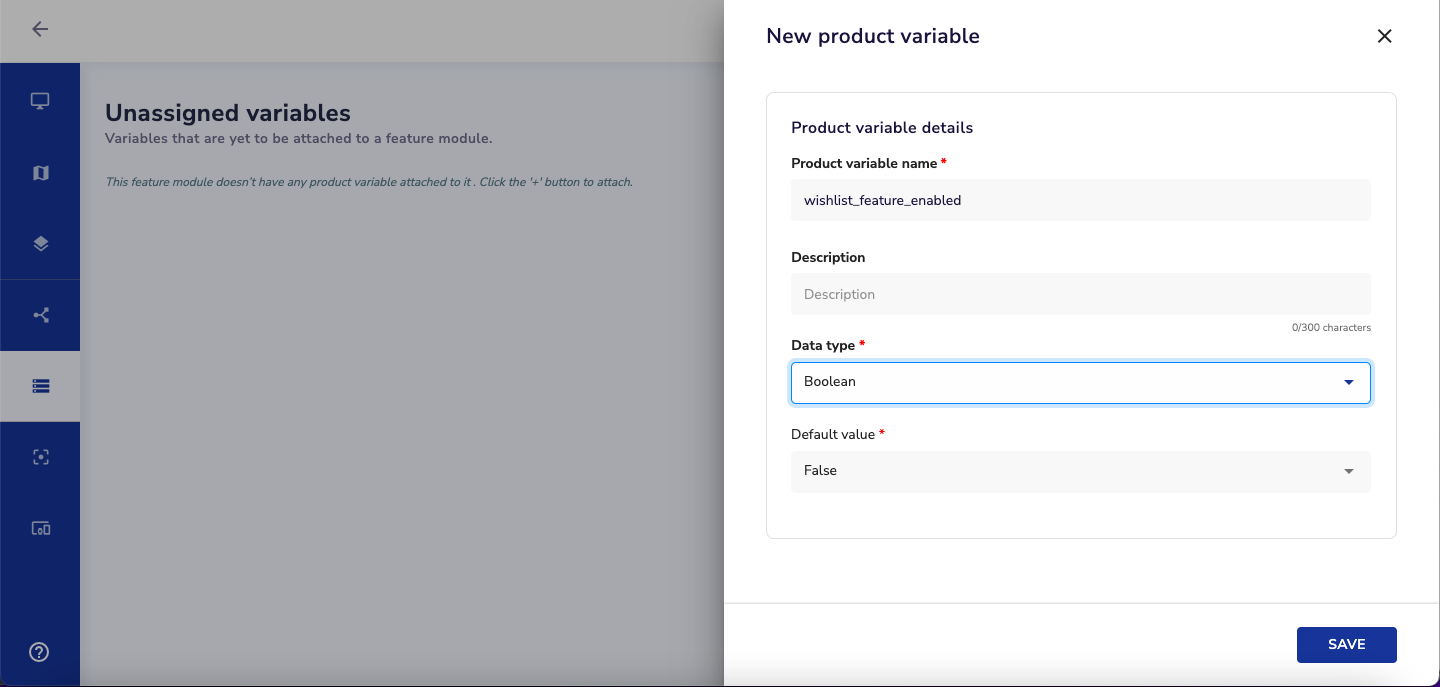
3: Start adding product variables once you have created a feature module. Each product variable has a key name, data type (string, number, boolean, or JSON), and default value.
Example: Adding a product variable wishlist_feature_enabled with a boolean datatype and default value as false to the Wishlist feature module.

Note
- In a similar manner, you can add multiple product variables to the given feature module.
- Otherwise, you can also create unassigned product variables, and add them to any already added feature module later on.
- You can also optionally enter a short “Description” for these product variables.
Using product variables from the dashboard in your app
Once you are done with the above step of creating the product variables, you need to implement the below code snippets based on the applicable data type and relevant feature module where you want to add these product variables.
Note
Please take a note following parameters when it comes to adding below mentioned code snippets to your app
- key : This is the name of the product variable on the Hansel Dashboard
- fallbackValue(optional) : This is a fallback value to use if the key doesn't exist or the connection with the Netcore backend hasn't been established. Although fallback value is optional it is recommended that you provide one.
1. Fetching the boolean product variable
NativeModules.HanselConfigsRn.getBoolean(KEY,DEFAULT_VALUE,callback);
 NativeModules.HanselConfigsRn.getBoolean('new_user',false,(value: boolean)=>{
    console.log('Hansel Config React Native'+value)
  });
2. Fetching the string product variable
NativeModules.HanselConfigsRn.getString(KEY,DEFAULT_VALUE,callback);
NativeModules.HanselConfigsRn.getString('total',"199",(value: string)=>{
    console.log('Hansel Config React Native'+value)
  });
3. Fetching the Number product variable
NativeModules.HanselConfigsRn.getDouble(KEY,DEFAULT_VALUE,callback);
NativeModules.HanselConfigsRn.getDouble('Version',2.2,(value: Double)=>{
    console.log('Hansel Config React Native'+value)
  });
4. Fetching the Json Object product variable
NativeModules.HanselConfigsRn.getJSONObject(KEY,DEFAULT_VALUE,callback);
var jsonObject = { name : 'abc',age : 27, gender : 'Male'};
  NativeModules.HanselConfigsRn.getJSONObject('data',jsonObject,(value: string)=>{
    console.log('Hansel Config React Native'+JSON.stringify(value))
  });
5. Fetching the Json Array product variable
NativeModules.HanselConfigsRn.getJSONArray(KEY,DEFAULT_VALUE,callback);
var jsonArray = [];
    var jsonObject = { name : 'abc',age : 27, gender : 'Male'};
    jsonArray.push(jsonObject);
  NativeModules.HanselConfigsRn.getJSONArray('data',jsonArray,(value: string)=>{
    console.log('Hansel Config React Native'+JSON.stringify(value))
  });
For version 3.7.0 and above, use the following code.
import { HanselConfigsRn } from 'smartech-reactnative-nudges'
1. Fetching the boolean product variable
HanselConfigsRn.getBoolean(KEY,DEFAULT_VALUE,callback);
 HanselConfigsRn.getBoolean('new_user',false,(value: boolean)=>{
    console.log('Hansel Config React Native'+value)
  });
**2. Fetching the string product variable**
HanselConfigsRn.getString(KEY,DEFAULT_VALUE,callback);
HanselConfigsRn.getString('total',"199",(value: string)=>{
    console.log('Hansel Config React Native'+value)
});
3. Fetching the Number product variable
HanselConfigsRn.getDouble(KEY,DEFAULT_VALUE,callback);
HanselConfigsRn.getDouble('Version',2.2,(value: Double)=>{
    console.log('Hansel Config React Native'+value)
});
4. Fetching the Json Object product variable
HanselConfigsRn.getJSONObject(KEY,DEFAULT_VALUE,callback);
var jsonObject = { name : 'abc',age : 27, gender : 'Male'};
HanselConfigsRn.getJSONObject('data',jsonObject,(value: string)=>{
    console.log('Hansel Config React Native'+JSON.stringify(value))
});
5. Fetching the Json Array product variable
HanselConfigsRn.getJSONArray(KEY,DEFAULT_VALUE,callback);
var jsonArray = [];
    var jsonObject = { name : 'abc',age : 27, gender : 'Male'};
    jsonArray.push(jsonObject);
 HanselConfigsRn.getJSONArray('data',jsonArray,(value: string)=>{
    console.log('Hansel Config React Native'+JSON.stringify(value))
 });
Step 3: Create your first A/B test and feature management journey
Once you finish the above steps, you can proceed to your Hansel dashboard and start creating your first journey under the Feature Management option from the left menu.
Updated 4 months ago
